Accounting
Accounting tracks the money that isn't a product sale: expenses, bills from suppliers, invoices you send, other income, and the reports your accountant asks for. Store sales flow in on their own.
Accounting lives in the Money and Reports groups of the sidebar, and its settings are at Settings → Accounting. It's included on a trial and on the current plans. If you don't see a Money group, Accounting isn't turned on for your store: check Billing or ask support.
Overview
Money → Overview (the Accounting Dashboard) shows:
- This month's and year-to-date income, COGS, expenses and net profit
- A 12-month trend and this month's costs by category
- Needs attention: three counts, each a link to the matching list:
- Expenses missing receipts this year opens the Expenses tab filtered to expenses with no receipt since January 1
- Overdue bills opens the Bills tab filtered to Overdue (unpaid or part-paid, past the due date)
- Unpaid invoices opens the Invoices tab filtered to Unpaid (draft, sent or part-paid)
- Recent expenses, with View All
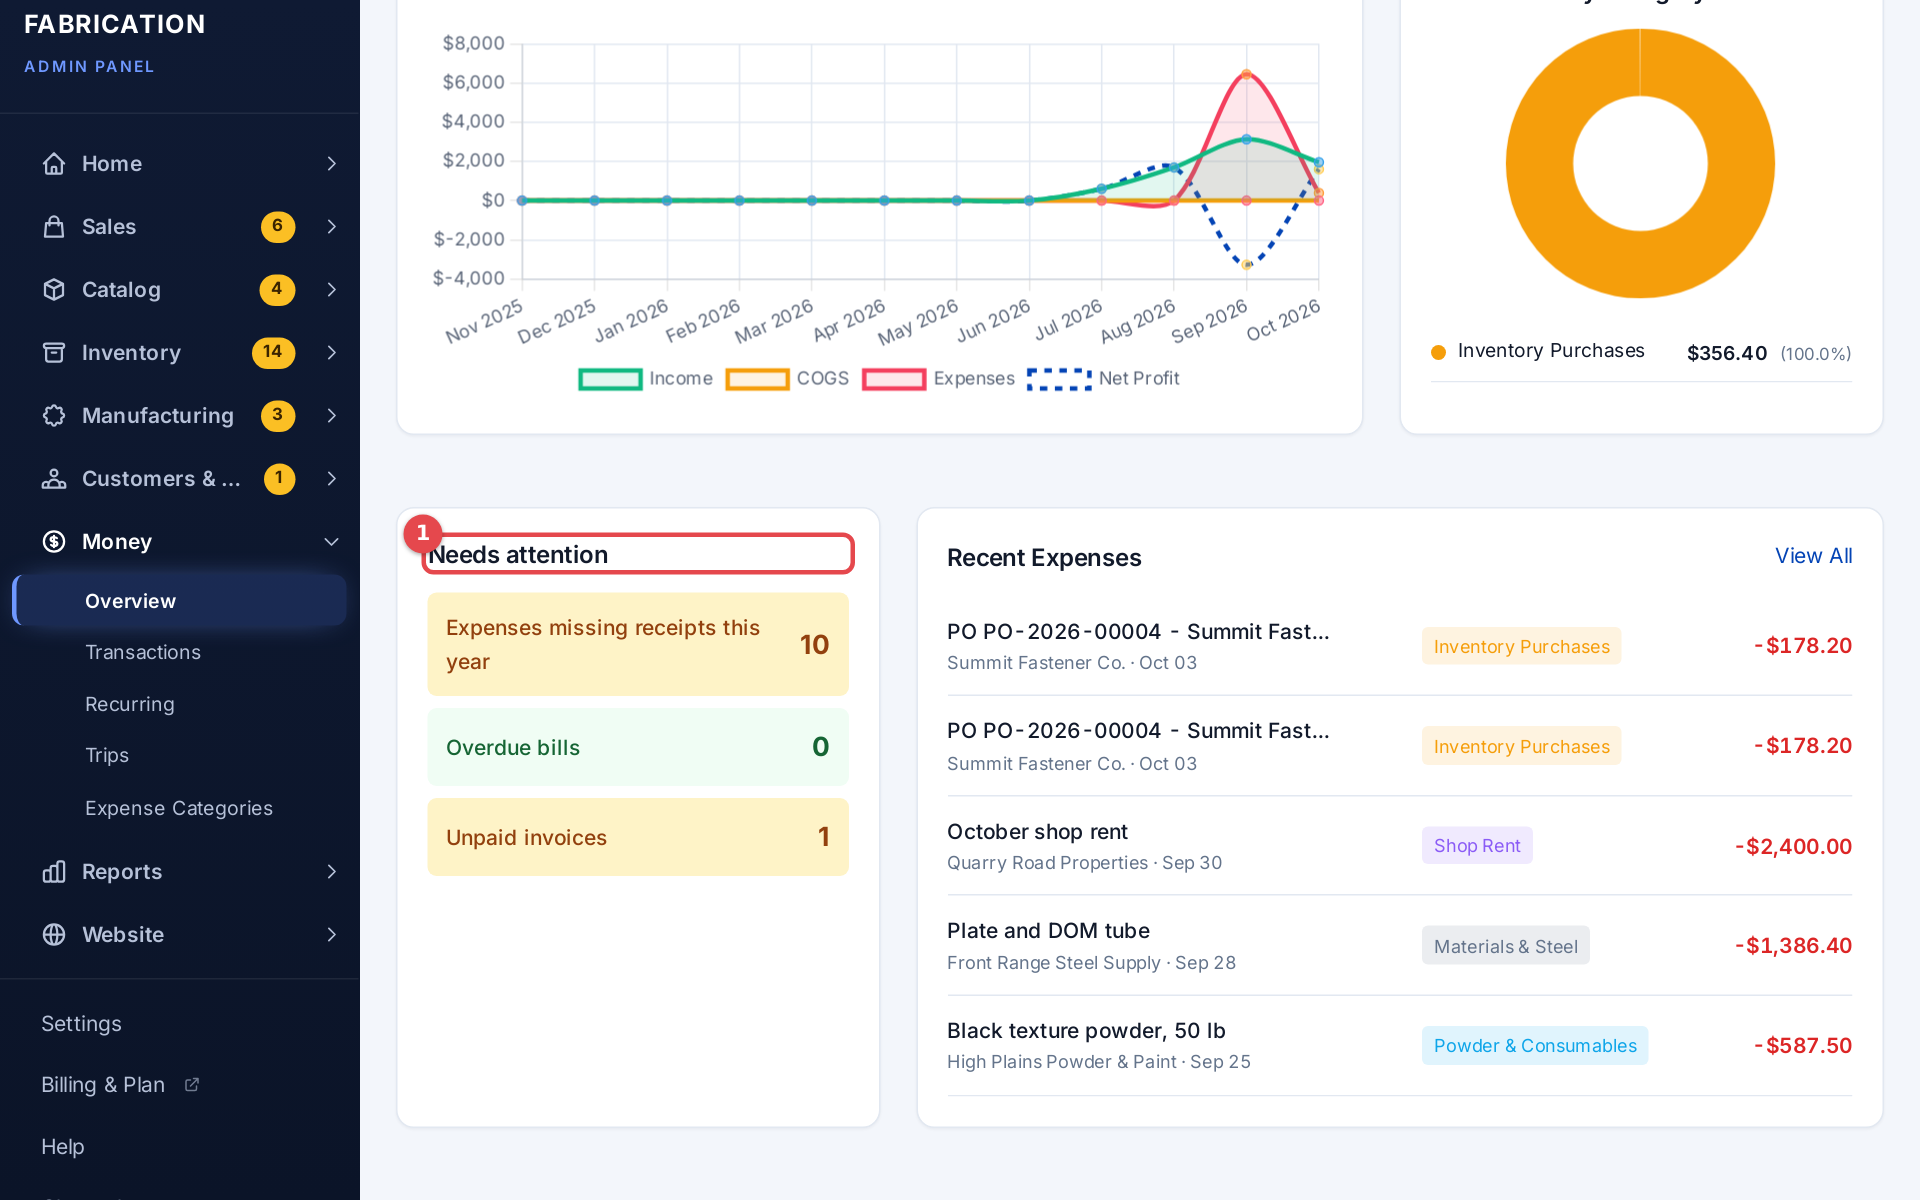 The Accounting Dashboard with the Needs attention counts
Transactions
Money → Transactions holds Income, Expenses, Bills and Invoices on one page, one tab each.
- Filters shared by every tab: Start Date, End Date and Search. Bills and Invoices also have a Status filter (Bills add Overdue, Invoices add Unpaid). Switching tabs keeps your dates and search, so you can look at the same period across all four.
- Tab-only filters: Expenses keep Category, Payment Method, Receipts and Cost Type; Income keeps Source and Payment Method. Expenses split into All / Expenses / COGS, and Income into All / Sales / Paid Invoices / Manual Records.
- Each tab has its own button: + Add Manual Income, + Add Expense, + Create Bill, + Create Invoice.
- The Expenses tab has Export CSV, which downloads the list with the filters you've set.
- Old links and bookmarks to the separate Income, Expenses, Bills and Invoices lists open the matching tab with the same filters.
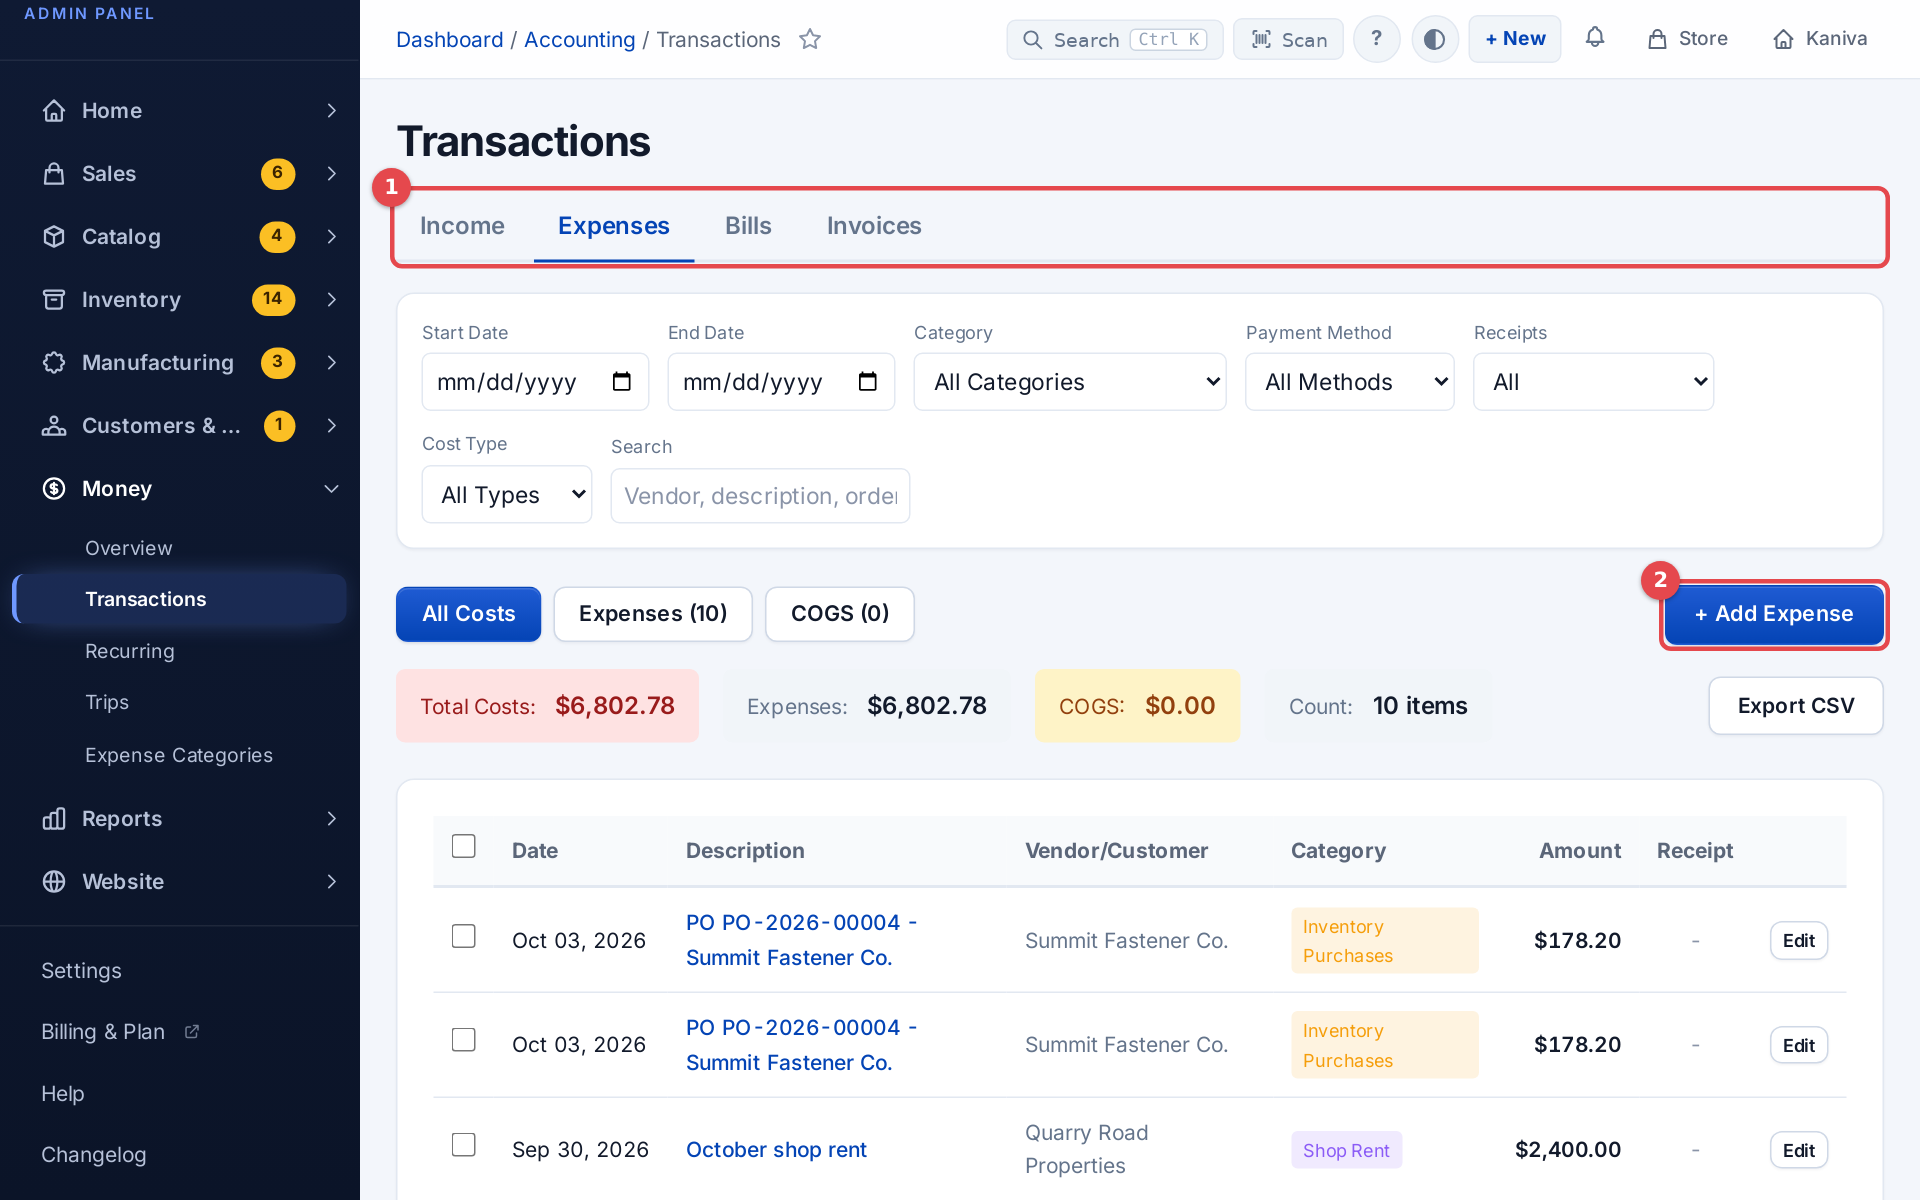 The Transactions page with its four tabs
Expenses
Track business expenses with receipts, categories and vendor information.
Adding an expense
- Go to Money → Transactions, open the Expenses tab and click + Add Expense.
- Fill in the details:
| Field | Description |
|---|---|
| Date | When the expense happened |
| Category | Expense category (see Expense categories) |
| Trip | Optional; shown once you have a trip (see Trips) |
| Description | What the expense was for |
| Vendor | Who you paid |
| Amount | Total expense amount |
| Tax Amount | Tax portion (optional) |
| Payment Method | How you paid (cash, card and so on) |
| Reference Number | Receipt or invoice number |
| Tax Deductible | Whether this expense is deductible |
| Notes | Anything else |
- Click Save Expense.
Attaching receipts
Attach receipt photos or PDFs under Receipts on the expense form:
- JPG, PNG, GIF, WebP, PDF or HEIC
- Up to 20 MB per file
- Several receipts can go on one expense
Tagging several expenses to a trip
On the Expenses tab, tick the expenses, pick a trip in the bar that appears (or — Remove from trip —) and click Apply to selected. The Income tab works the same way.
Receipt OCR (auto-extract)
OCR reads receipt photos and pulls out the vendor, date, total, tax, payment method, reference number and line items.
Turning OCR on
- Open Settings → Accounting and find Receipt OCR (Auto-Extract).
- Add a card under Add Payment Method. OCR is billed per scan to this card, and the price per scan is shown on the page. Adding the card turns OCR on.
- To turn it off later, untick Enable Receipt OCR and click Save Settings.
To change the card, click Update next to the card on file, enter the new card and click Update Payment Method.
Using OCR
Upload a receipt image to an expense and it's read automatically. On the expense's page, each receipt shows what was found. Where it differs from the expense (vendor, date, total or tax), tick what you want and click Apply to Expense. If the result is poor or you have a better photo, click Re-extract. OCR works on images only, not PDFs.
OCR usage
Settings → Accounting shows OCR Usage: scans and cost This Month and This Year, and a Monthly Breakdown table. Every scan counts at the same price: receipts, and supplier invoices read by Scan Supplier Invoice or Phone Upload on the Bills tab. A scan that fails isn't charged.
Phone receipt upload
Photograph receipts on your phone and upload them without signing in on the phone.
- On the expense form, click Upload from Phone (or Phone Upload on an expense's page).
- Choose the options:
| Option | Description |
|---|---|
| Link to Expense (Optional) | Attach uploads to one expense, or Create new expense for each upload |
| Max Uploads | 5, 10, 25 or 50 uploads |
| Expires In | 1 hour, 4 hours, 24 hours, 3 days or 1 week |
- Click Generate QR Code and scan it with your phone's camera. Already on the phone? Use Open upload page on this device instead.
- On the phone, choose to link to the pre-selected expense, Create new expense from receipt (with a short description), or Or add to existing expense.
- Take the photo or pick one from the gallery, then tap Upload Receipt. OCR reads it if it's turned on.
On a phone, the expense form also has 📷 Snap a receipt — create the expense automatically: photograph a receipt and a new expense is filled in from it.
Tips for good OCR results: good light, the whole receipt in frame, no shadows or glare, the receipt flat.
Recurring expenses
Money → Recurring holds expenses you pay on a schedule: rent, subscriptions, utilities.
- Click + Add Recurring Expense.
- Fill in the expense details (Category, Payment Method, Description, Vendor, Amount, Tax Amount, Tax Deductible, Notes).
- Under Recurrence Schedule set the Frequency (Daily, Weekly, Monthly or Yearly) and Every (for example every 3 months). For weekly, you can pick a Day of Week; for monthly, a Day of Month. If a month is shorter, it uses the last day.
- Set the Start Date, and an End Date if it stops. Leave the end date blank to keep going.
- Click Create Recurring Expense.
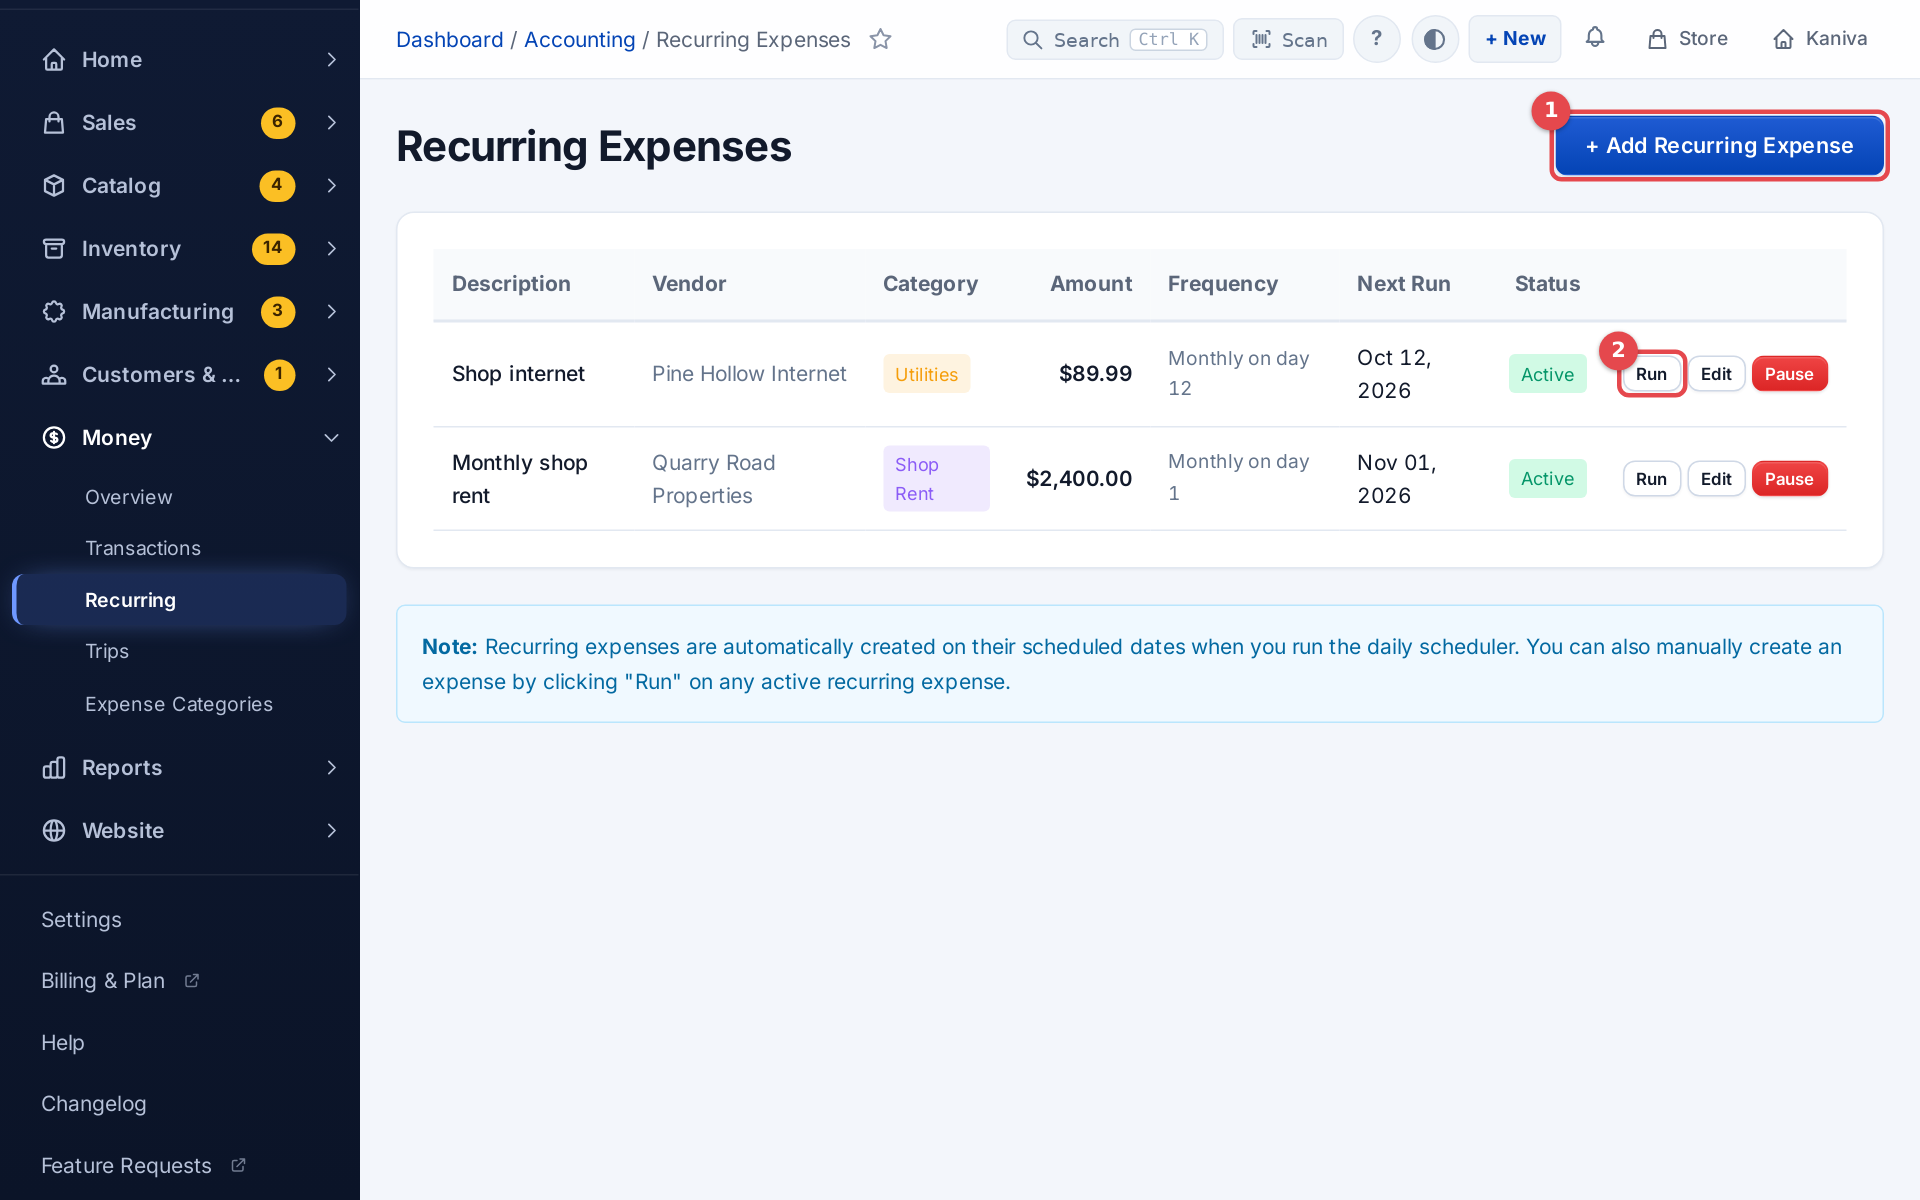 Recurring expenses with their next run dates and the Run button
The list shows each one's Next Run date (Today or Overdue when it's due) and whether it's Active or Paused.
- Each active recurring expense is recorded automatically early in the morning on its next run date, dated that day, and its next run date moves on. If some dates were missed, each one is recorded with its own date.
- Run records one now, dated today, and moves the next run date on.
- Pause stops a recurring expense; Activate starts it again.
- Edit changes the amount or schedule.
Income
Income from store orders and paid invoices is recorded on its own. An order counts on the day it was placed, and a refund on the day it was made, so a refund in October on a September order comes off October's income. Use manual income for anything else: services, interest, refunds you received.
- Go to Money → Transactions, open the Income tab and click + Add Manual Income.
- Enter the Date, Source (Sales, Invoice Payment, Services, Refund Received, Interest Income or Other Income), Description, Amount, and optionally a Trip, Reference Number and Notes.
- Click Add Income.
Trips
See whether a trip (a trade show, a sales road trip) paid off by grouping its income and expenses and reading off the net profit.
Creating a trip
- Go to Money → Trips and click + New Trip.
- Enter the Trip Name (for example "SEMA Show 2026") and Status. Destination, Start Date, End Date and Notes are optional.
- Click Create Trip.
Tagging income and expenses to a trip
Once a trip exists, an optional Trip field appears on these forms:
- Expenses: hotel, fuel, booth fee
- Income: cash sales made on the trip
- Invoices: the invoice's payments count toward the trip
- Orders: an order's page has a Trip card; pick the trip and click Save Trip
Tagging is optional and you can undo it. Untagged items still appear in your normal reports.
A trip's profit
Open the trip from Money → Trips to see its Profit & Loss: income (orders, invoices and other income), less cost of goods sold, operating and other expenses, down to Net Profit with its margin. Below are the income and expense items behind the totals. Download PDF gives a printable trip report.
Deleting a trip only untags its income and expenses. It never deletes them.
Expense categories
Money → Expense Categories sorts your expenses for the reports.
- Click + Add Category.
- Enter the Category Name and pick a Color.
- Tax Category (for exports) groups the category in tax reports.
- Expense Type decides where it lands on the P&L: Cost of Goods Sold, Operating Expense or Other Expense.
- Sort Order (lower numbers first) and Active (inactive categories leave the dropdowns).
- Click Create Category.
Invoices
Send invoices that customers can pay online by card.
Creating an invoice
- Go to Money → Transactions, open the Invoices tab and click + Create Invoice.
- Fill in the invoice:
| Field | Description |
|---|---|
| From (Your Company) | Company Name and Address |
| Bill To (Customer) | Customer Name, Email (needed to send the invoice) and address |
| Invoice Date | Date of the invoice |
| Due Date | When payment is due (needed for reminders) |
| Status | Draft, Sent, Paid or Cancelled |
| Line Items | Description, Qty and Unit Price; + Add Line Item adds a row |
| Tax | Added to the subtotal |
| Trip | Optional |
| Notes | Visible to the customer |
| Terms & Conditions | Payment terms |
| Payment Reminders | See Payment reminders |
- Click Create Invoice.
Sending an invoice and online payment
- Open the invoice from the Invoices tab.
- Click Send Invoice to email the payment link. The customer gets an email with a "View & Pay Invoice" button.
- Or click Copy Link and share it any way you like. Preview shows the customer's page.
The customer sees your invoice with its line items and totals, a Pay Now button while it's unpaid, and a PDF download. They pay by card through Stripe.
After a payment:
- The status changes to Paid, or Partially Paid if they paid less than the balance.
- The payment appears under Payments on the invoice, and a matching income record is created.
- The customer sees a confirmation page, with a "Pay Another Installment" button if a balance remains.
Payment emails
When a customer pays an invoice online, two emails go out:
- To you, at the Admin Notification Email on Settings → General. The subject reads "Invoice #X paid in full — $Y" or "Payment received: Invoice #X — $Y ($Z remaining)". It includes the amount, payment method, Stripe reference, customer details and a View Invoice in Admin button.
- To the customer, a receipt with your logo and company name. If they paid part, it has a Pay Remaining Balance button.
Payments you record by hand (cash, check, ACH) don't send these emails.
Payment reminders
Kaniva can email customers about unpaid invoices: a courtesy notice 3 days before the due date, then a reminder every 7 days while the invoice stays overdue. Reminders stop when the invoice is paid or cancelled; a partly paid invoice keeps getting reminders for the rest. An invoice needs a Due Date and a customer Email for reminders.
Turning reminders on for the store: on Settings → Accounting, under Invoice Payment Reminders, tick Send payment reminders for unpaid invoices and click Save Reminder Settings. It's off until you turn it on.
Per invoice: the Payment Reminders field on the invoice form overrides the store setting: Use store default, Always send reminders or Never send reminders. The invoice page shows the current setting and how many reminders have gone out.
Partial payments
Invoices take several payments until the balance is paid.
- Customer side: the invoice page has an amount field, filled in with the balance. The customer can pay any amount from $0.50 up to the balance, and come back to the same link to pay more.
- Your side: on the invoice, under Record a payment, enter the Amount, Date, Method and an optional Reference #, then click Record Payment. The balance updates and an income record is created. Delete on a payment row undoes a mistake and removes its income record.
Invoice statuses
| Status | Description |
|---|---|
| Draft | Created but not sent |
| Sent | Emailed to the customer |
| Partially Paid | Some paid, a balance remains |
| Paid | Paid in full |
| Cancelled | Voided |
Invoice actions
On the invoice's page:
- Mark Paid in Full records one payment for the whole remaining balance (one click for cash or check).
- Print and Download PDF (both show Paid and Balance Due on a partly paid invoice).
- Edit changes the invoice. Setting Status to Paid there asks whether to record a payment for the balance. Say yes to log it and turn off the online pay button; say no and only the label changes, so the balance stays due and the pay link stays live.
- Delete Invoice removes it, with its payments and income records.
Bills
Bills are what you owe suppliers. Receiving a purchase order creates its bill on its own (see Purchasing). Add bills by hand for anything else, such as utilities or services.
Bills are on the Bills tab of Money → Transactions.
How bills work
- A purchase order is received, or you create a bill: you owe the amount.
- Record payments against it, all at once or in parts.
- When it's paid, it closes. On cash basis, that's when the expense reaches your P&L.
Creating a bill
Click + Create Bill. Fill in the Vendor, Bill Date, Due Date, Amount, and optionally Tax Amount, Category, Payment Terms (for example "Net 30"), Tax Deductible, description and notes, then click Create Bill.
To skip the typing, use Scan Supplier Invoice at the top of the form: upload a photo of the supplier's invoice and click Scan to fill in the form. Phone Upload on the Bills tab gives a QR code: photograph supplier invoices on your phone and a bill is created from each one.
Recording a payment
On the bill's page, fill in the payment form: Amount (the balance, unless you change it), Payment Date, Payment Method and a reference such as a check number. Click Record Payment. A part payment leaves the bill Partially Paid until the rest is paid.
Bill statuses
| Status | Description |
|---|---|
| Unpaid | Nothing paid yet |
| Partially Paid | Some paid, a balance remains |
| Paid | Paid in full |
| Cancelled | Voided |
A bill past its due date with money still owed shows OVERDUE.
Reports
The Reports group has the accounting reports next to Analytics:
- Reports → P&L: income, cost of goods sold, expenses and net profit for a period, on your accounting method (accrual or cash).
- Reports → Balance Sheet: what the business owns and owes on a date (As of). Assets are Accounts Receivable (unpaid invoices) and Inventory Value (worked out from stock on hand and cost). Liabilities are Accounts Payable. Owner's Equity is assets minus liabilities. Cash & Bank and Loans & Notes Payable show Not tracked: Kaniva doesn't hold your bank balances or loans, so keep those elsewhere.
- Reports → Expense Report: expenses By Category, By Payment Method and the Top 10 Expenses for the dates you pick.
- Reports → Tax Summary: tax-deductible expenses grouped by tax category, for your accountant.
- Reports → Year-End: see below.
Year-End report
Reports → Year-End is a printable report for one calendar year, for your accountant or tax filing. Pick the year and click Print / PDF.
It shows the same three blocks, with the same numbers, as the other reports for that year:
- the Profit & Loss annual summary
- the P&L monthly breakdown
- the Tax Summary (tax-deductible expenses by category)
It's built from those reports, so its totals always match them. The per-category expense breakdown is on the Expense Report.
Accounting method
Choose your method on Settings → Accounting, under Accounting Method, and click Save Accounting Method.
Accrual Basis (recommended, the default)
- Expenses are recorded when goods are received, whether or not you've paid.
- Required by GAAP for businesses with inventory.
- Gives a truer picture of profit.
Cash Basis
- Expenses are recorded when you pay the bill.
- Simpler for small businesses.
- Money only shows on reports when it changes hands.
Changing method mid-year can make your reports harder to compare. Existing records aren't changed. Talk to your accountant before switching.