Add a part and put it on a shelf
Use this when a new part comes into the shop: something you sell, or hardware and raw material you use. You end up with an inventory item, a label on the part, and its stock in a bin Kaniva knows about.
Before you start
- Bins and scanning need Advanced Inventory. Without it, a part is just a product with a stock number (see Products).
- A barcode scanner or a phone camera makes the shelf steps quick. See Barcode scanners.
The flow
- StartYou have a new part to stock
- Is Advanced Inventory on for your store?No
- Type the count in the product's Stock Quantity and save
- Done
Yes- Carry on below
- Do you sell this part?Yes
- Create the product in Catalog → Products; Kaniva makes its item
No- In Inventory → Items, click + New Item
- Pick a Home bin, type Initial Stock, click Create Item
- 1Open the item's page and check its Home bin
- 2Click Print item label and print it
- 3Stick the label on the part, bag or box
- Is there a labelled bin on a shelf for it?No
- Print tags from New bin tags on Inventory → Locations
- On Inventory → Scan stock, choose Place bins on shelves
- Scan the shelf label, then the bin tag
Yes- Carry on below
- 4Open Inventory → Scan stock and choose Put away stock
- 5Scan the bin label
- 6Scan the part's label
- 7Tap Put the N not in a bin here, or Add here
- 8Tap Make this its home bin if this is where it lives
- DoneThe part is labelled, in its bin, and the stock is right
Step by step
Making the item
A part you sell: create the product as usual in Catalog → Products. Kaniva makes its inventory item for you. The item's home bin is your starting location (Main Warehouse unless you changed it; see Where new products start), and any Stock Quantity you typed is counted as Not in a bin until you put it away. After that, change stock on the item's page, not the product form.
A part you don't sell (hardware, raw material, consumables): open Inventory → Items and click + New Item. The fields that matter most:
- **Name *** and **Unit Cost ***.
- Primary Supplier and Supplier SKU, so you can reorder it later. + New supplier under the list makes a supplier from just a name (and website) and picks it, without leaving the item.
- **Trigger Level (Reorder Point) *** and **Restock Quantity ***: when to reorder and how many.
- **Home bin ***: required. Pick the bin it'll live in, or your starting location if it has no bin yet.
- Initial Stock: how many you have. They count as Not in a bin until step 7.
Click Create Item. All fields are explained in Creating an item.
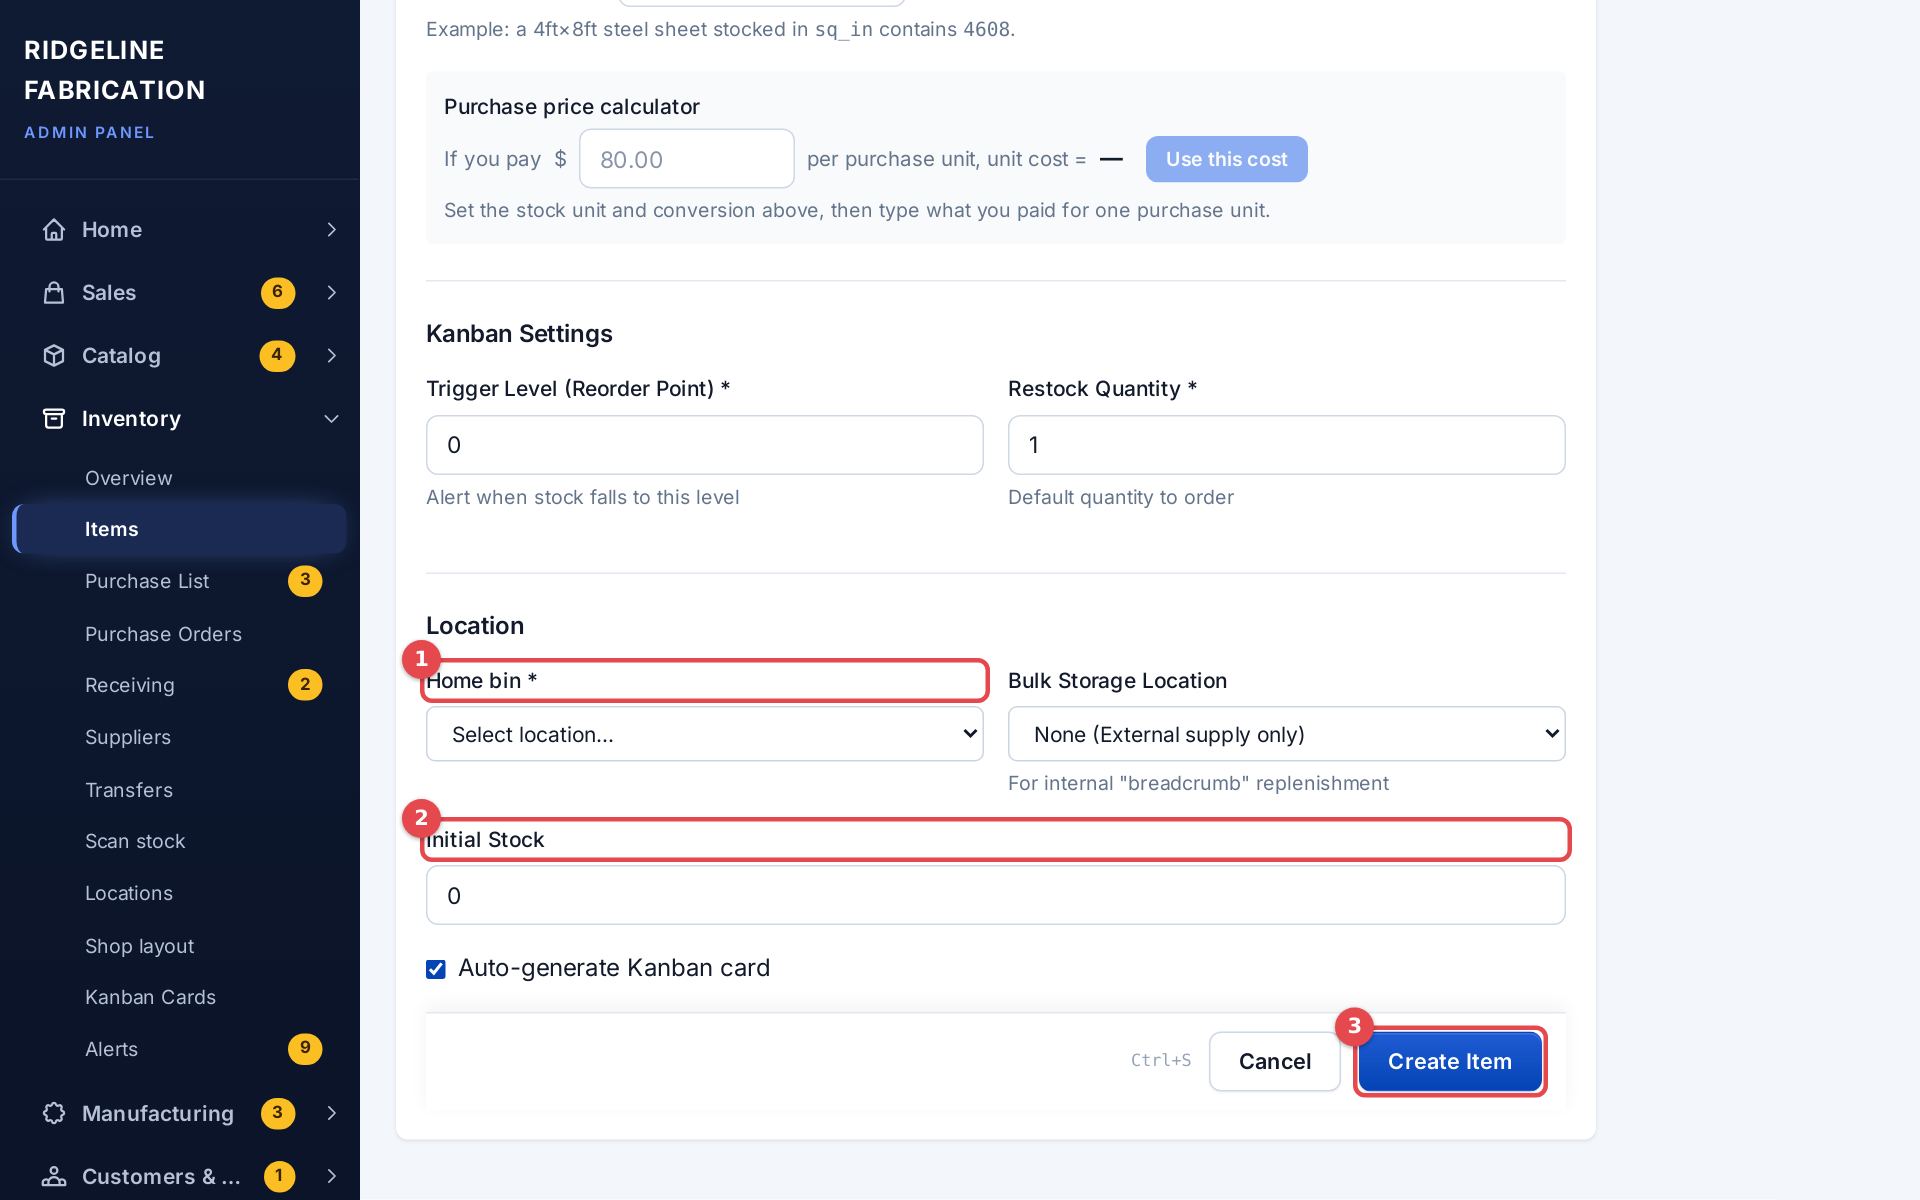 The New Item form
1. Check the home bin
On the item's page, the Home bin is listed under its details and first under Where it is. If it's wrong, click Edit, pick the right **Home bin *** and Update Item. If the bin doesn't exist yet, leave it for now: step 8 can set it.
2. Print the label
Click Print item label. On the label page pick the size (3 × 1.5 in thermal, or a NIIMBOT size) and layout, then Print, Download PDF, Send to printer (PrintNode) or Print to NIIMBOT. The barcode is the item's SKU; for a product that's its part number, so the same label also rings up at the register. For a product you can also use Print product label on the product's page. See Item labels and Printing Product Labels.
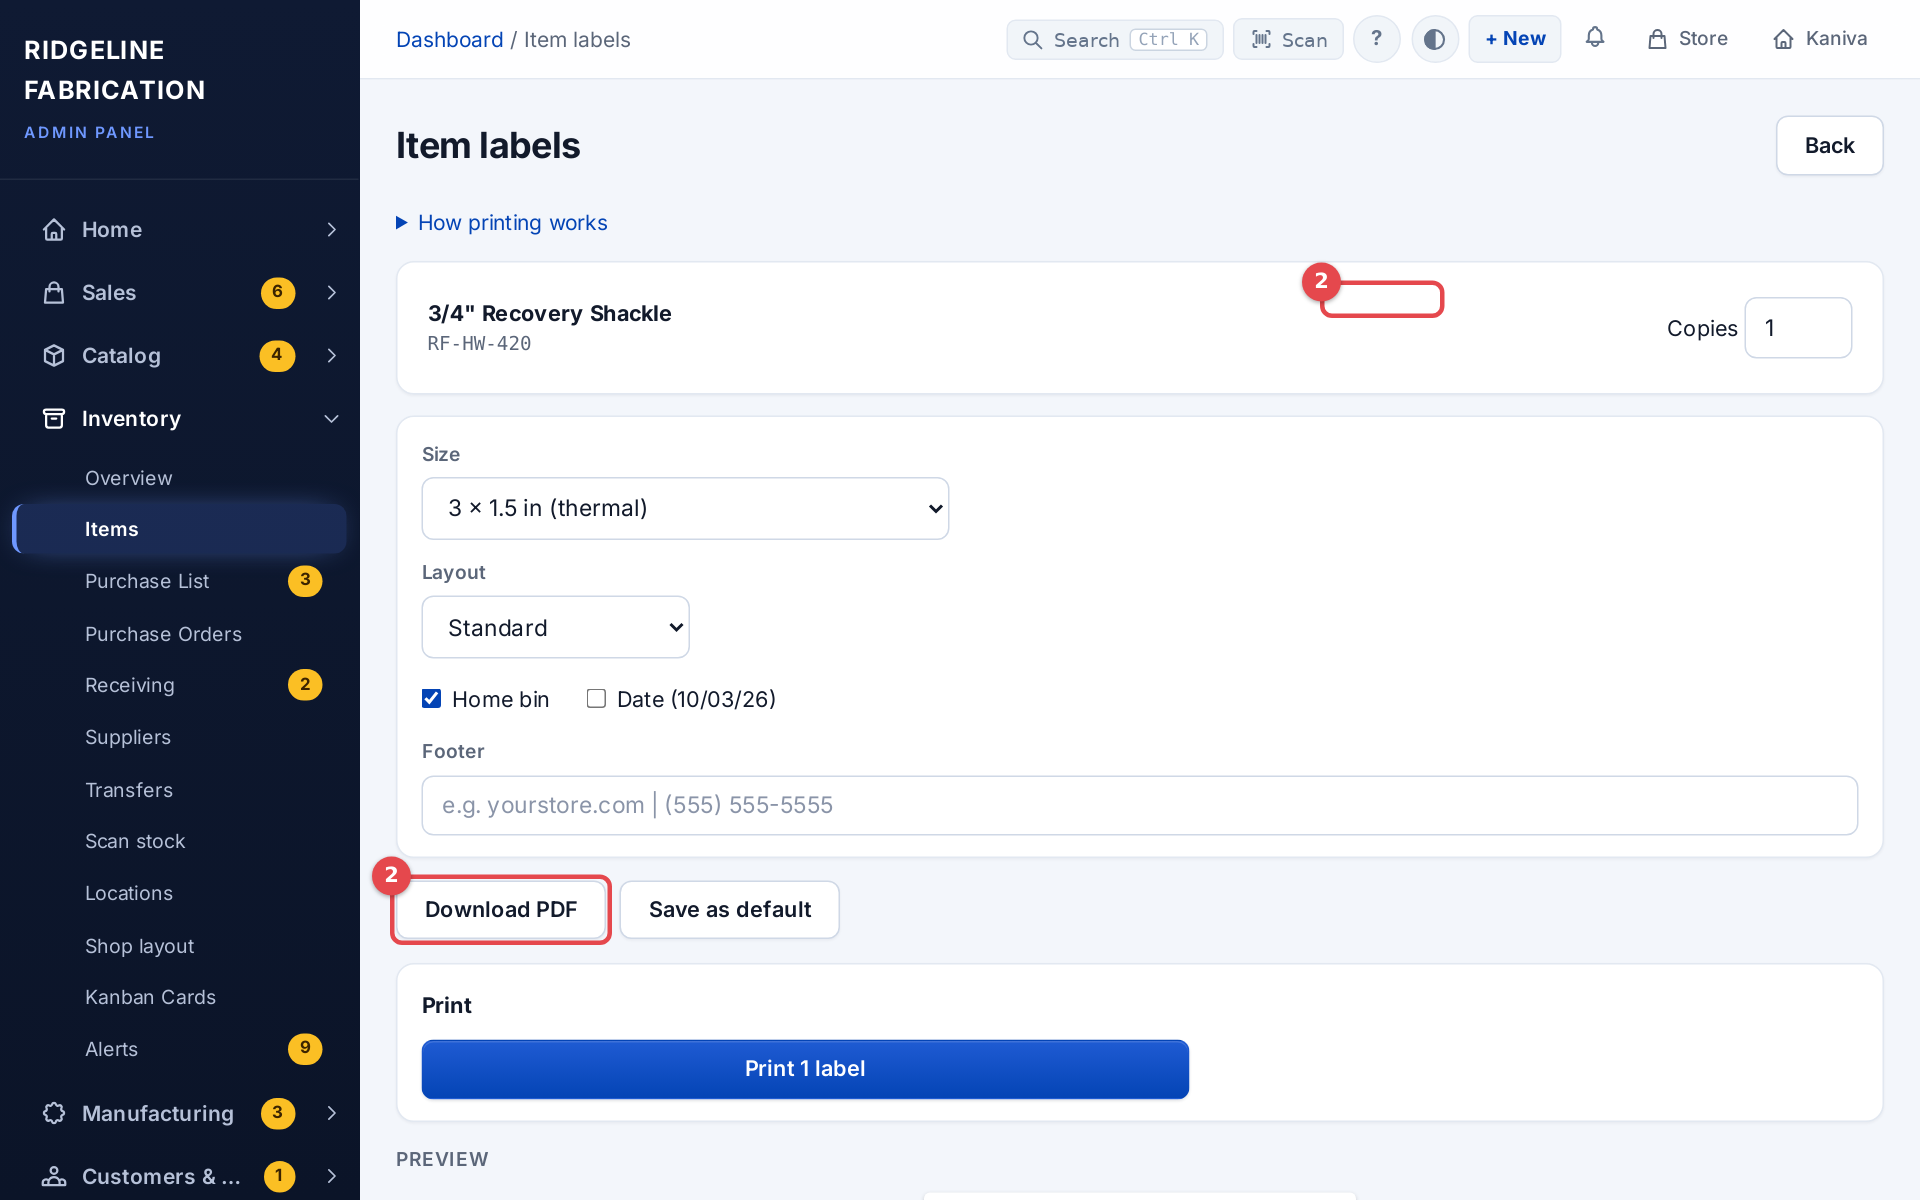 The label page for an item
3. Label the part
Stick the label on the part, its bag or its box, wherever someone will scan it when picking or counting.
If the bin has no label yet
- On Inventory → Locations, under New bin tags, enter How many and click Print new bin tags. Kaniva makes that many bins under Unassigned bins and opens their labels.
- Stick a tag on each bin or tote.
- On Inventory → Scan stock, choose Place bins on shelves, scan the shelf label (for example
A-03-2), then each bin tag that sits on it.
Shelves get their labels from the Shop layout or from Print bin label on a location. See Placing bins on shelves.

4. Open the Scan page
Open Inventory → Scan stock on a phone, or on a computer with a scanner, and make sure Put away stock is chosen at the top.
5. Scan the bin
Scan the bin's label. It becomes the current bin, shown big at the top.
6. Scan the part
Scan the label you printed in step 2. Kaniva shows how many are in this bin, how many are Not in a bin yet, and where else the part is.

7. Put the stock in the bin
- Put the N not in a bin here moves the stock you typed when you made the item into this bin. The total doesn't change.
- Add here adds new stock (use + and − or type a number).
8. Make it the home bin
If this bin is where the part lives, tap Make this its home bin. Picking, and stock that comes back from returns and receiving, go to the home bin first.
No scanner? The item's page does the same: Put in a bin under Not in a bin, + Add stock to another bin, and Edit for the home bin.
If something goes wrong
- The scan opens the wrong thing: two things share the code. Pick the right one from the list, and give the bin its own Barcode on its Edit page.
- "Scan a bin label first": in Put away stock mode, a part needs a bin. Scan the bin, then the part.
- A product scans but has no item: Kaniva offers the New Item form for it. Save it, then scan again.
Related
- Inventory: items, stock on the item's page, labels
- Bins, shop layout and scanning: locations, bin tags, the Scan page
- Order and receive stock
- Count and adjust stock