Run a build-to-order job
Use this when a customer orders something you make after they buy it. The order gets work orders, the parts go to the machine, the operator runs the job on the Floor Kiosk, and the finished product goes out in a box.
Before you start
- Manufacturing is in your sidebar (it needs Advanced Inventory). See Manufacturing.
- The product is a build-to-order product, with an inventory item that has an active BOM. Without one, no work orders can be made for it. See BOMs.
- Your machines are listed at Manufacturing → Work Centers, and your BOM operations name them.
- Your operators have PINs: Operators on Manufacturing → Work Orders. See Floor Kiosk.
- Optional: a work zone for each work center on Inventory → Shop layout, so Kaniva tells you when a job's parts have arrived. See Work zones.
The flow
- StartA customer has paid for a build-to-order product
- Is the product set to Per Unit or Single Batch?Yes
- Its work orders are created when the order is paid
No- Click Create work orders on the order line
- 1Open the job from the order line or Manufacturing → Work Orders
- 2Set the Work Center, due date and priority, and Print the sheet
- 3Bring the parts to the work center's zone
- TipWhen every part is there, the job shows Ready to start and a push goes out
- 4On the Floor Kiosk, the operator logs in with their PIN
- 5Scan the work order or tap Find job, then tap Start
- 6Use Pause, Log scrap and Report down as the job runs
- 7Tap Done and enter the good parts
- TipNo kiosk? Click Start Production, then Complete, on the work order page
- 8When every work order for the line is done, the line moves to Packing
- 9Click Ship on the order's step bar, then pack and ship it
- DoneThe product is built and on its way
Step by step
1. Open the job
When the order is paid, Kaniva looks at the product's Work Order Creation setting (on the product's edit page):
- Per Unit: one work order per unit ordered. Three units, three work orders.
- Single Batch: one work order for the whole quantity.
- Manual Only: nothing is created; you click Create work orders on the order line.
- Use Store Default: the Default Work Order Mode on Settings → General.
On the order's page, each build-to-order line shows its work order numbers (and "2/3 complete" as they finish). A line without work orders has Create work orders. Either way the line's build stage moves to Processing, and the order's step bar to Building.
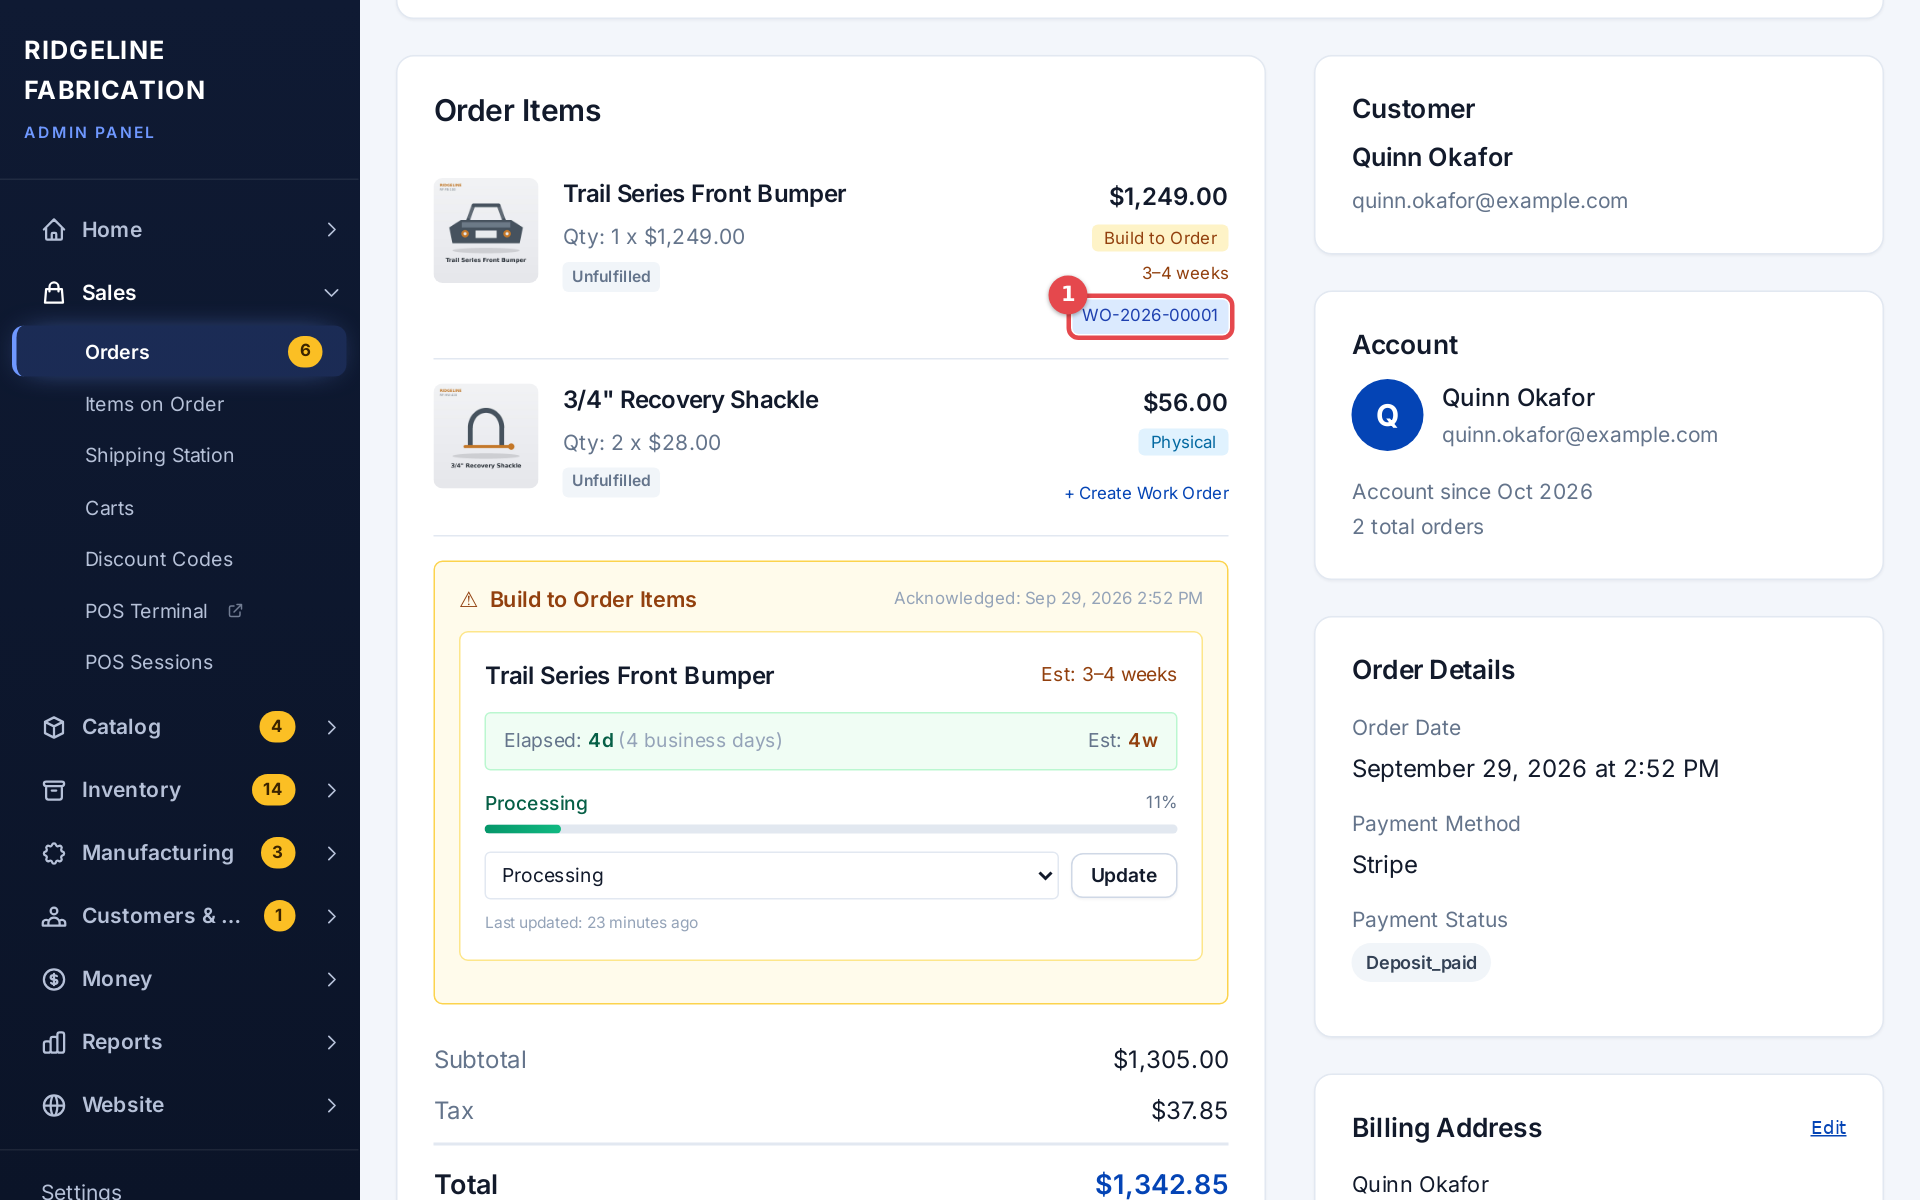 A build-to-order line with its work order numbers
Click a work order number to open it, or find it on Manufacturing → Work Orders. New work orders are drafts with Normal priority.
2. Set it up and print the sheet
On the work order, click Edit to set the Work Center (the machine or station), the Due Date and the Priority, then Save Changes. Pick who's doing it under Assigned To and click Save. The Customer Order card shows the order, the customer and any options they chose.
Print gives a sheet for the shop floor with the customer order, the operations and steps, and boxes for Done and Initials.
If the page lists Component Shortages, order the missing parts first (see Purchasing). The job can't start until they're in stock.
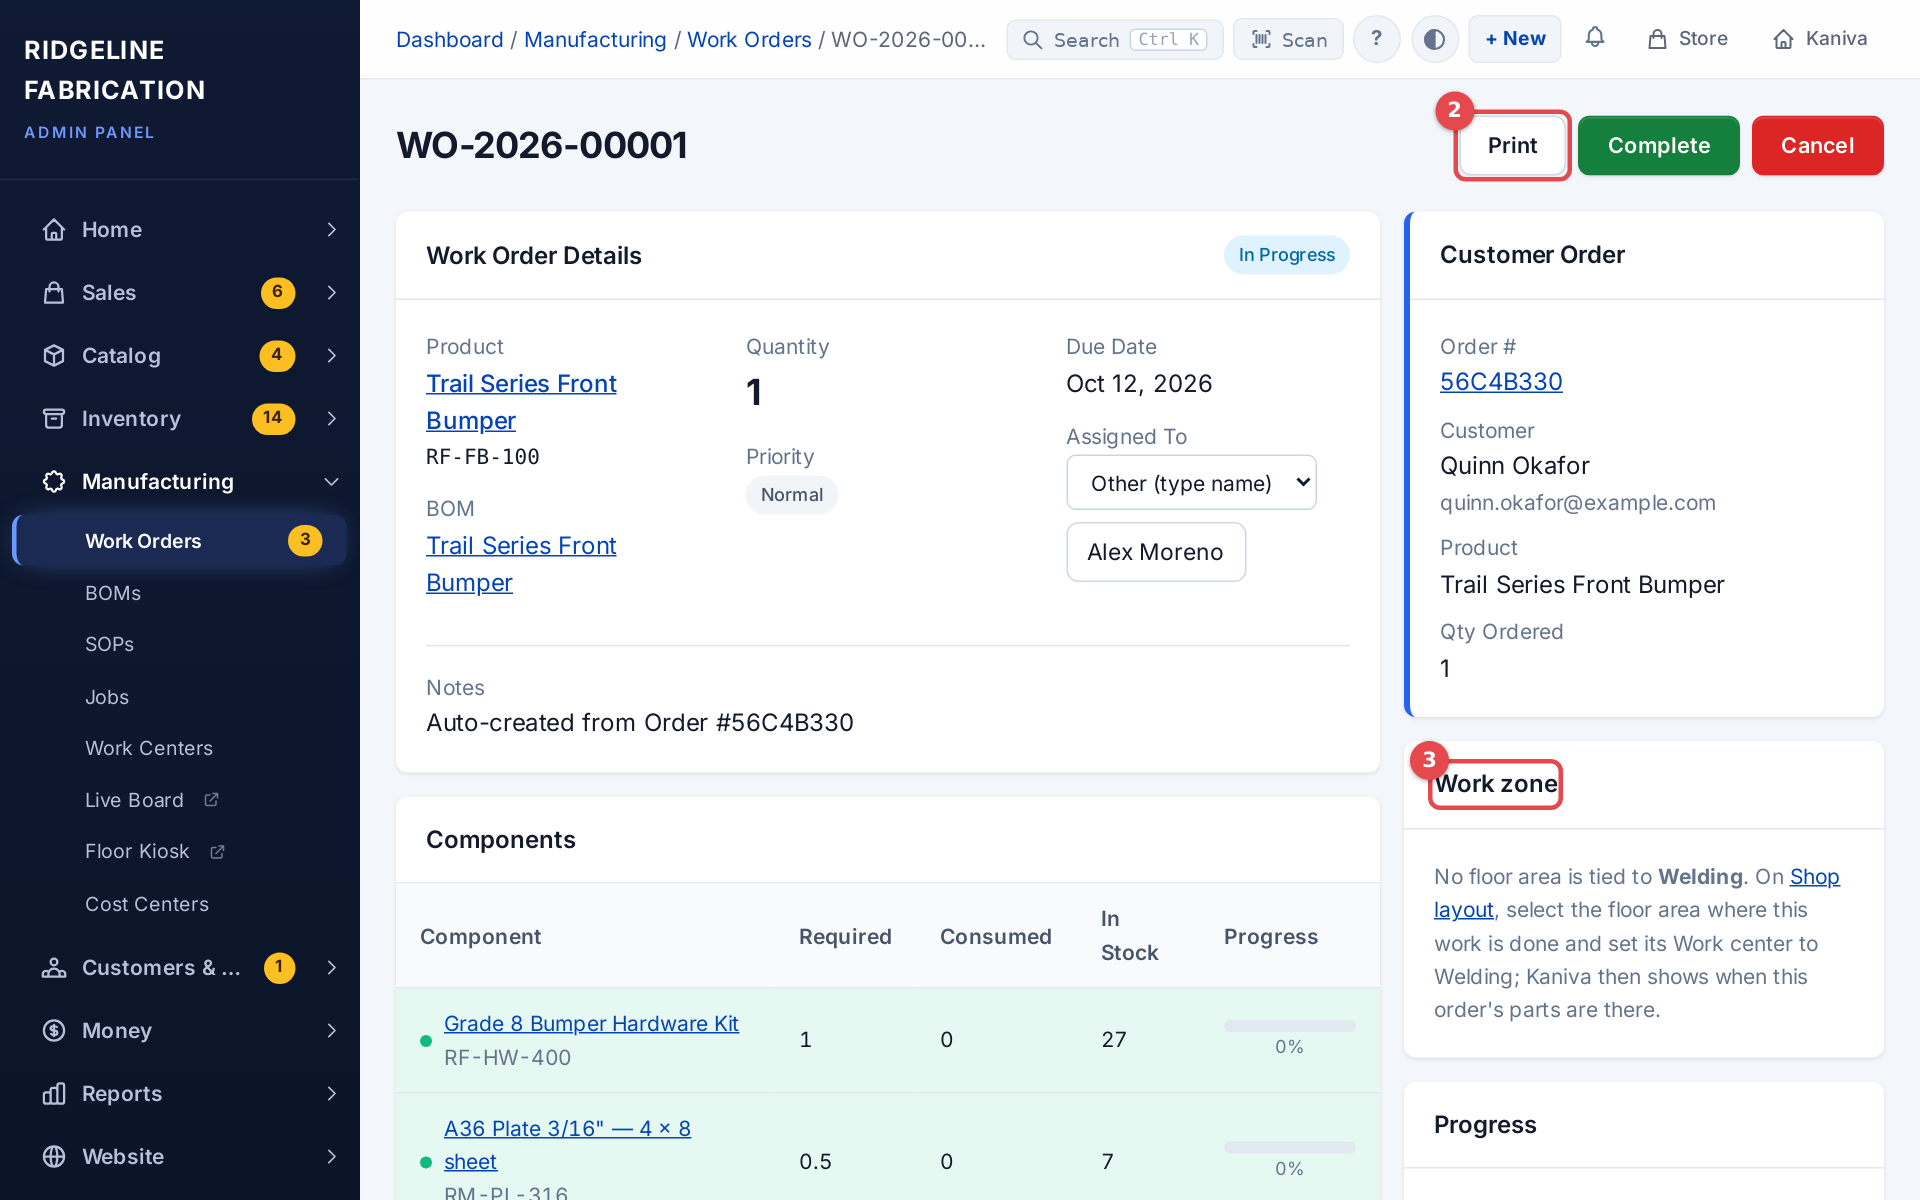 A work order page with its Work zone card
3. Bring the parts to the work center
Move the parts to the work center's zone on the shop floor: scan them onto that floor area, or into a bin or cart parked there (see Bins and scanning). The Work zone card on the work order lists what's still to bring and where it is now, for example At A-03-2 (12).
When the last part arrives, the work order shows Ready, the Floor Kiosk and Live Board show ✓ parts in the zone, and everyone with push notifications on is told. No zone set up? Skip this step; the job can still start.
4. Log in at the Floor Kiosk
Open Manufacturing → Floor Kiosk on the shop-floor tablet (it stays signed in). Under Operator log in, the operator types their PIN or scans their badge. Pick the Machine at the top to see only that machine's jobs.
5. Start the job
Scan the barcode on the printed sheet, or type the work order number and tap Find job. Or pick it from the list of open jobs. Tap Start: a timer runs, and the Live Board shows the job running.
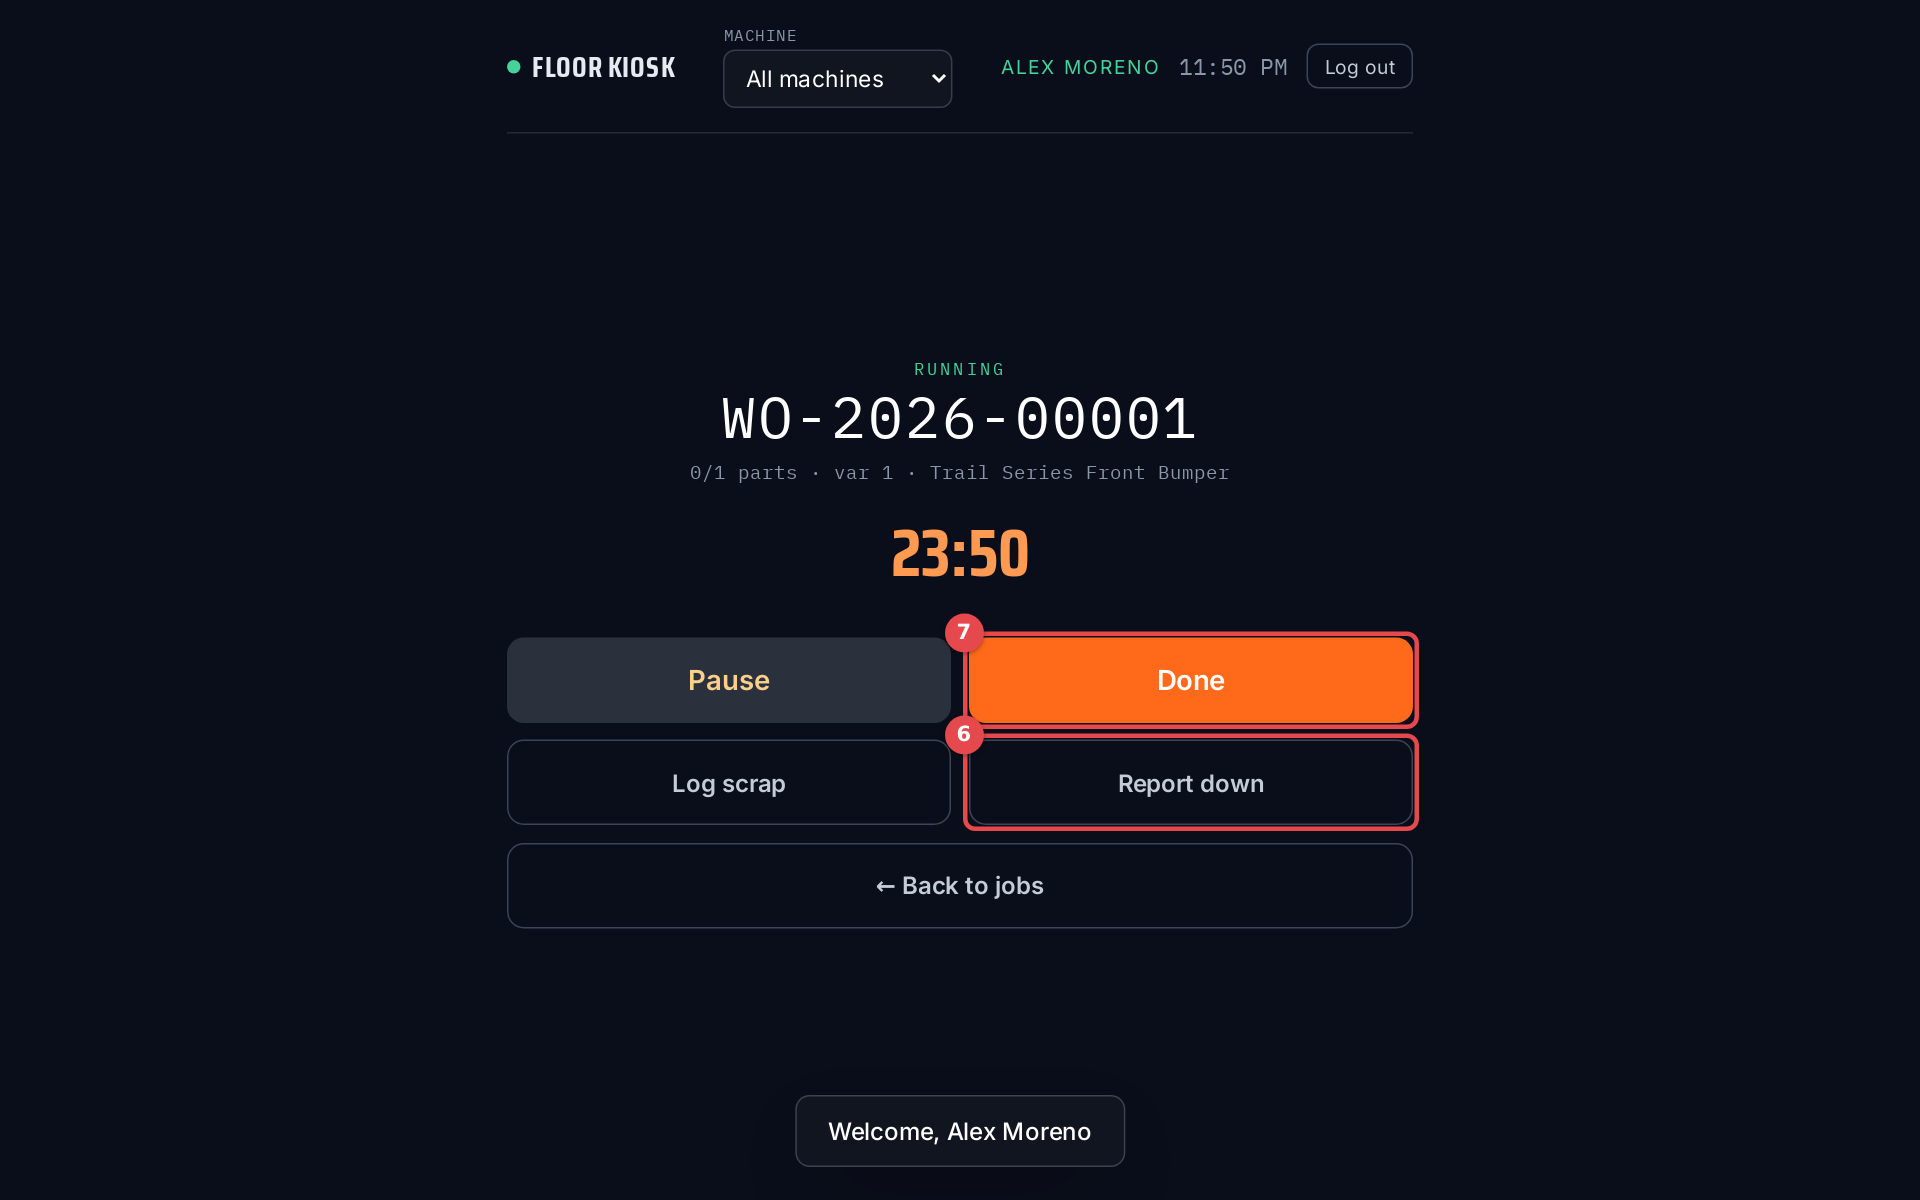 The Floor Kiosk with a job running
6. Run it
- Pause and Resume for breaks, so labour time stays real.
- Log scrap with a reason and how many, whenever a part is ruined.
- Report down when the machine stops, with the reason. The job pauses. Tap End downtime when it's running again. Downtime shows on the downtime report (Downtime on Manufacturing → Work Orders).
7. Finish it
Tap Done, enter the Good parts produced and confirm. The work order is completed: the parts come out of stock (from the work zone first, then each item's home bin) and the finished product goes in.
Not using the kiosk? On the work order page, click Start Production, work through any Operations (Start, then enter Good and Scrap and click Complete), and click Complete at the top.
8. The line moves to Packing
When every work order for the order line is completed, the line's build stage moves to Packing, and the order's activity log records it. Until then, the order line shows how many are done.
9. Ship it
On the order's step bar, the main button is Ship when the next step is Shipped. If you've added your own steps in between (for example "Powder coat" or "QC"), the button is Mark {step}: click it as the order passes each one. Then pick, pack and ship as in Pick, pack and ship an order.
If something goes wrong
- No Create work orders button: the order is completed, cancelled or already has a label, or the line already has work orders.
- "No active BOM found" or "No inventory item linked" when you click it: the product needs an inventory item with an active BOM. Create the BOM at Manufacturing → BOMs.
- Start Production is greyed out: hover over it. Insufficient components means a shortage; All sub-work orders must be completed first means the BOM is set to Block parent until complete.
- The job isn't on the kiosk: check the Machine picker at the top (try All machines) and the work order's Work Center. Completed and cancelled jobs aren't listed.